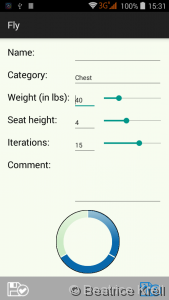
Mobile form containing data from database
After the description of all the Layout issues, I had to struggle with while developing my first Android App ‘Fitness Manager’, this time I want to write about databases in Android Apps. The Layout of the ‘Fitness Manager’ App had to be filled with data, statistics and life.
The integration of a database in Android Apps is very simple and easy. The developer just needs to implement a Java subclass that overwrites the functions onCreate and onUpgrade of the SQLiteOpenHelper API. In order to access the subclass an object of the subclass has to be instantiated.
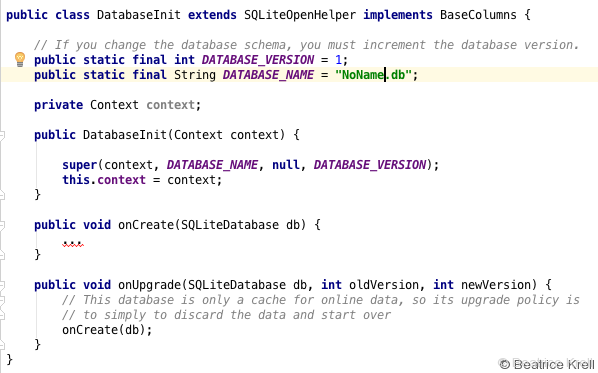
Java subclass extending SQLiteOpenHelper
Finished 🙂
No but almost. Now tables have to be created, deleted and filled with values. Many database operations can be handled in different ways with SQLiteOpenHelper.
-
Create a table by just executing a SQL command.

SQL command: Create table
-
Delete a table by just executing a SQL command.

SQL command: Delete table
-
Insert an entry into a table by just executing a SQL command.

SQL command: Insert table entry
Insert an entry into a table by using SQLiteOpenHelper API. The function getWriteableDatabase has to be called in the beginning of the operation when putting entries into databases.
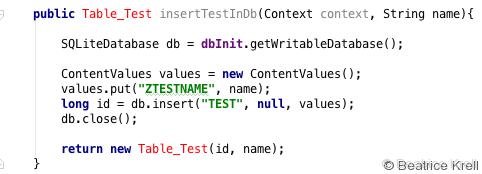
SQLiteOpenHelper: Insert table entry
-
Updating an entry of a table by using SQLiteOpenHelper API. The function getWriteableDatabase has to be called in the beginning of the operation when putting updating entries of databases.
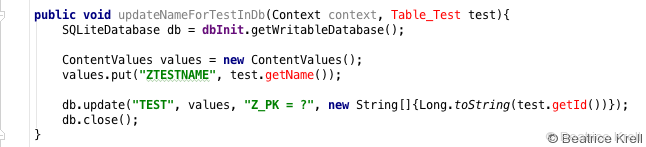
SQL command: Update table entry
-
Delete an entry from a table by just executing a SQL command.
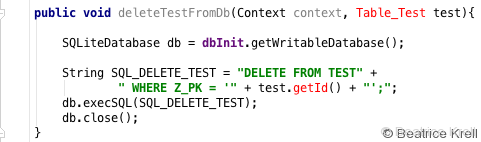
SQL command: Delete table entry
-
Selecting a single row entry from a table of the database by using SQLiteOpenHelper. The function getReadableDatabase has to be called in the beginning of the operation when selecting entries from databases.
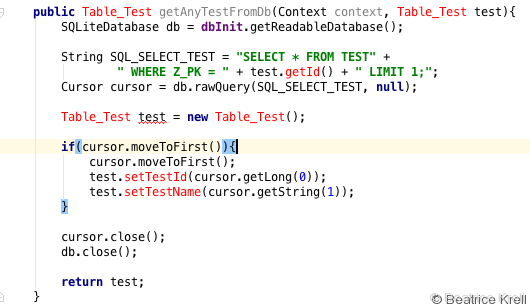
SQL command: Select single row entry from table
-
Selecting multiple row entries from a table of the database by using SQLiteOpenHelper. The function getReadableDatabase has to be called in the beginning of the operation when selecting entries from databases.
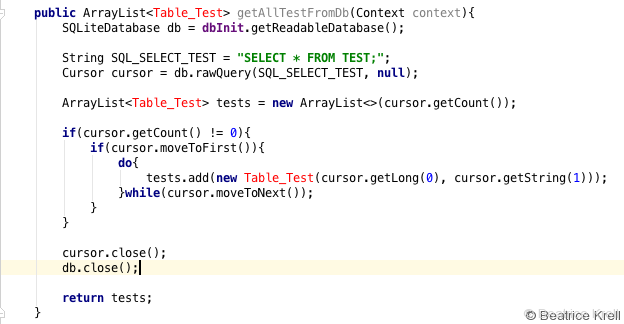
SQL command: Select multiple row entries from table
These are the most convenient operations and functions for implementing databases for Android App devices.
In order to receive the data of the database in a virtual Android device of Android Studio, the AVD Manager can be used. The AVD Manager can be found within Tools – Android – AVD Manager or you just click the corresponding ImageButton in the Toolbar of Android Studio.
AVD-Manager in Android Studio Toolbar
Within the AVD Manager the developer has to switch to the File Explorer tab. After selecting the virtual device in AVD Manager, the database can be found in data/data/<package_name>/databases/<db_name>.db. The database file can be pulled from virtual device by using the small ImageButton in the right top corner of the AVD Manager.
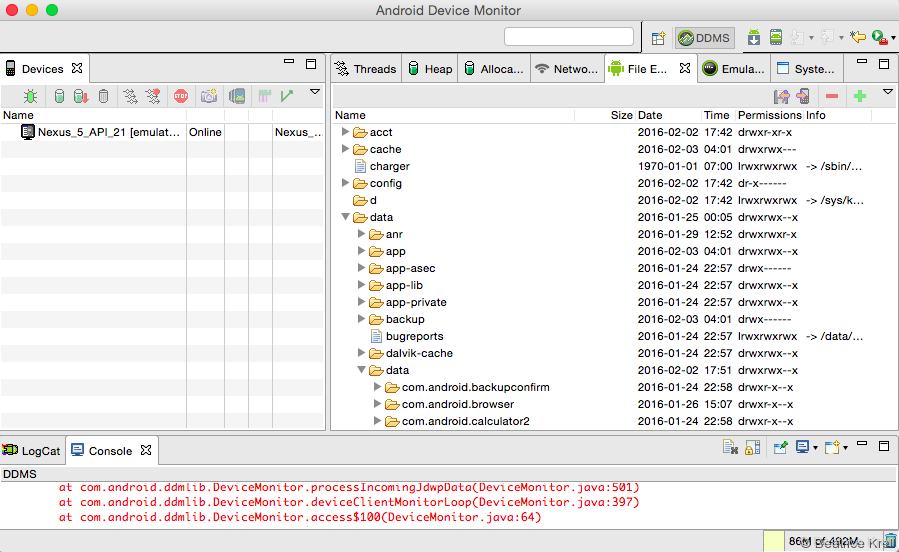
AVD-Manager FileExplorer
In order to receive the data of the database in a real device, the ADB Terminal has to be used. The data of a real device is not accessable with the AVD Manager of the Android Studio. The ADB can be found in the folder /Android/sdk/platforms-tools. Most often this directory is located in the user directory. A terminal must be opened at this directory and the PULL command is executed for ADB.
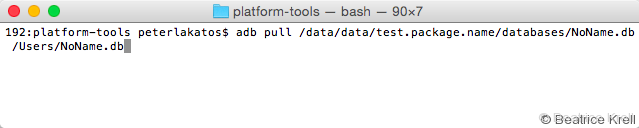
ADB-Terminal
The data of the database can be verified using the SQLiteManager of Firefox. This tool can be found within Firefox – Extras.
That’s it. Sweet.
If you have any questions, any improvement suggestions for the implementation (I mentioned that this is my first Android App) or any improvement suggestions for my English, I really would appreciate if you can leave me a comment.
And I would even more appreciate if you like to check out the ‘Fitness Manager’ App in the Google Play Store or the ‘Fitness Manager’ App in the iTunes Store. See you.
Follow us on